I’m currently enrolled in a Cloud Computing course, and as we are starting to learn about the fundamentals of setting up a cloud environment, the first step is setting up a continuous integration pipeline. NOTE: I’ll be using screenshots and material from our course website, which can be found here.
What is continuous integration, and why do I need it?
As a data scientist, this was the first question that came to my mind. I’ve been able to run models on my local computer, or using Colab, so why do I need to have this fancy pipeline for my project?
Running models locally is fine if you’re working on school projects or one-off analyses, but for products that are deployed at scale (which is the case for any relevant data science product), continuous integration is a necessary forethought. Starting off every project with a continuous integration setup saves time, money, and wasted effort down the road.
So what is it? Continuous integration means that multiple developers on a project can push small changes continuously (as opposed to periodically) and these changes are tested before being added to the code base. This ensures that all final code is tested, linted, and has the necessary requirements listed out.
Great! How do I get started?
My project team is using CircleCI for our continuous integration pipeline, so I’ll be going through the steps for using CircleCI with a project in Github. The steps are also detailed here, if you want more information.
The first step is to create a Github repository for your project; once that’s done, you can log into CircleCi with your Github account by going to the CircleCI website. After you log into your dashboard, you can click on the ‘Add Projects’ tab on the left side of the screen. This will take you to your repositories, and you can select which one you want to set up continuous integration for.
Note: If you are working on a project github repository that is not hosted by your account, then the owner of that repository will have to add you as a collaborator before you can see it show up on CircleCi. Once that’s done, you will see them listed as an organization in the top left; in the example below, you’ll see that drwitt is the owner, so I can click on this picture and then see the right repository.
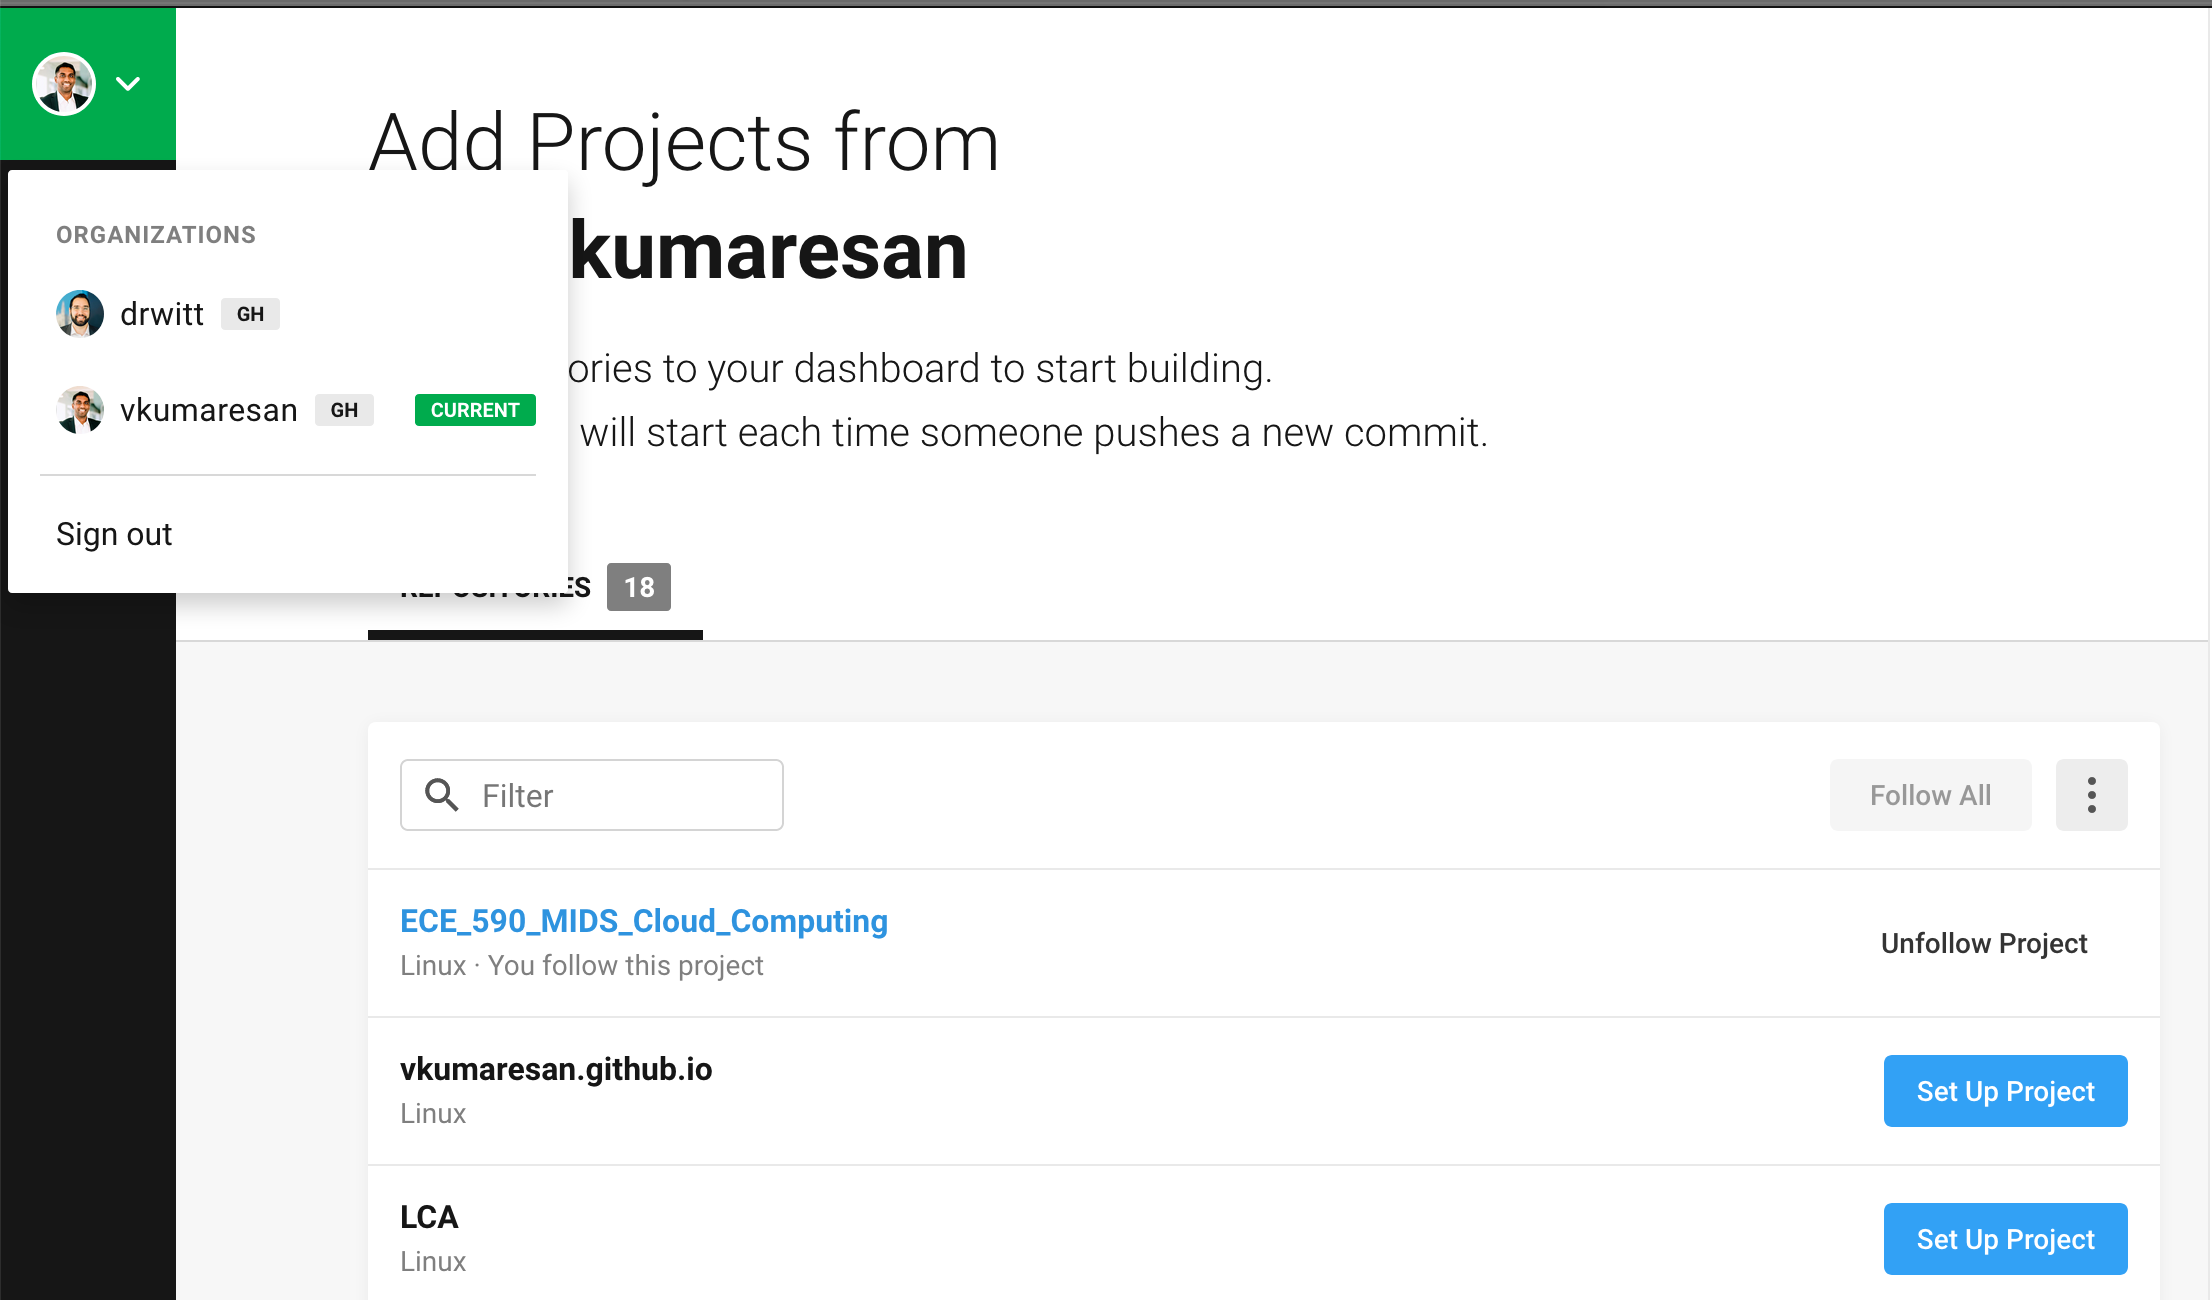 I’m logged in to my Github account (vkumaresan), but the project repository is hosted by drwitt.
After you see the project repository that you want to set up, you can click on the blue ‘Set Up Project’, which will take you to the next page. This page allows you to define your config.yml file, which is a necessary file to add to your repo. You can choose the language you want, and after you click on the ‘Start Building’ button, you can download the config.yml file.
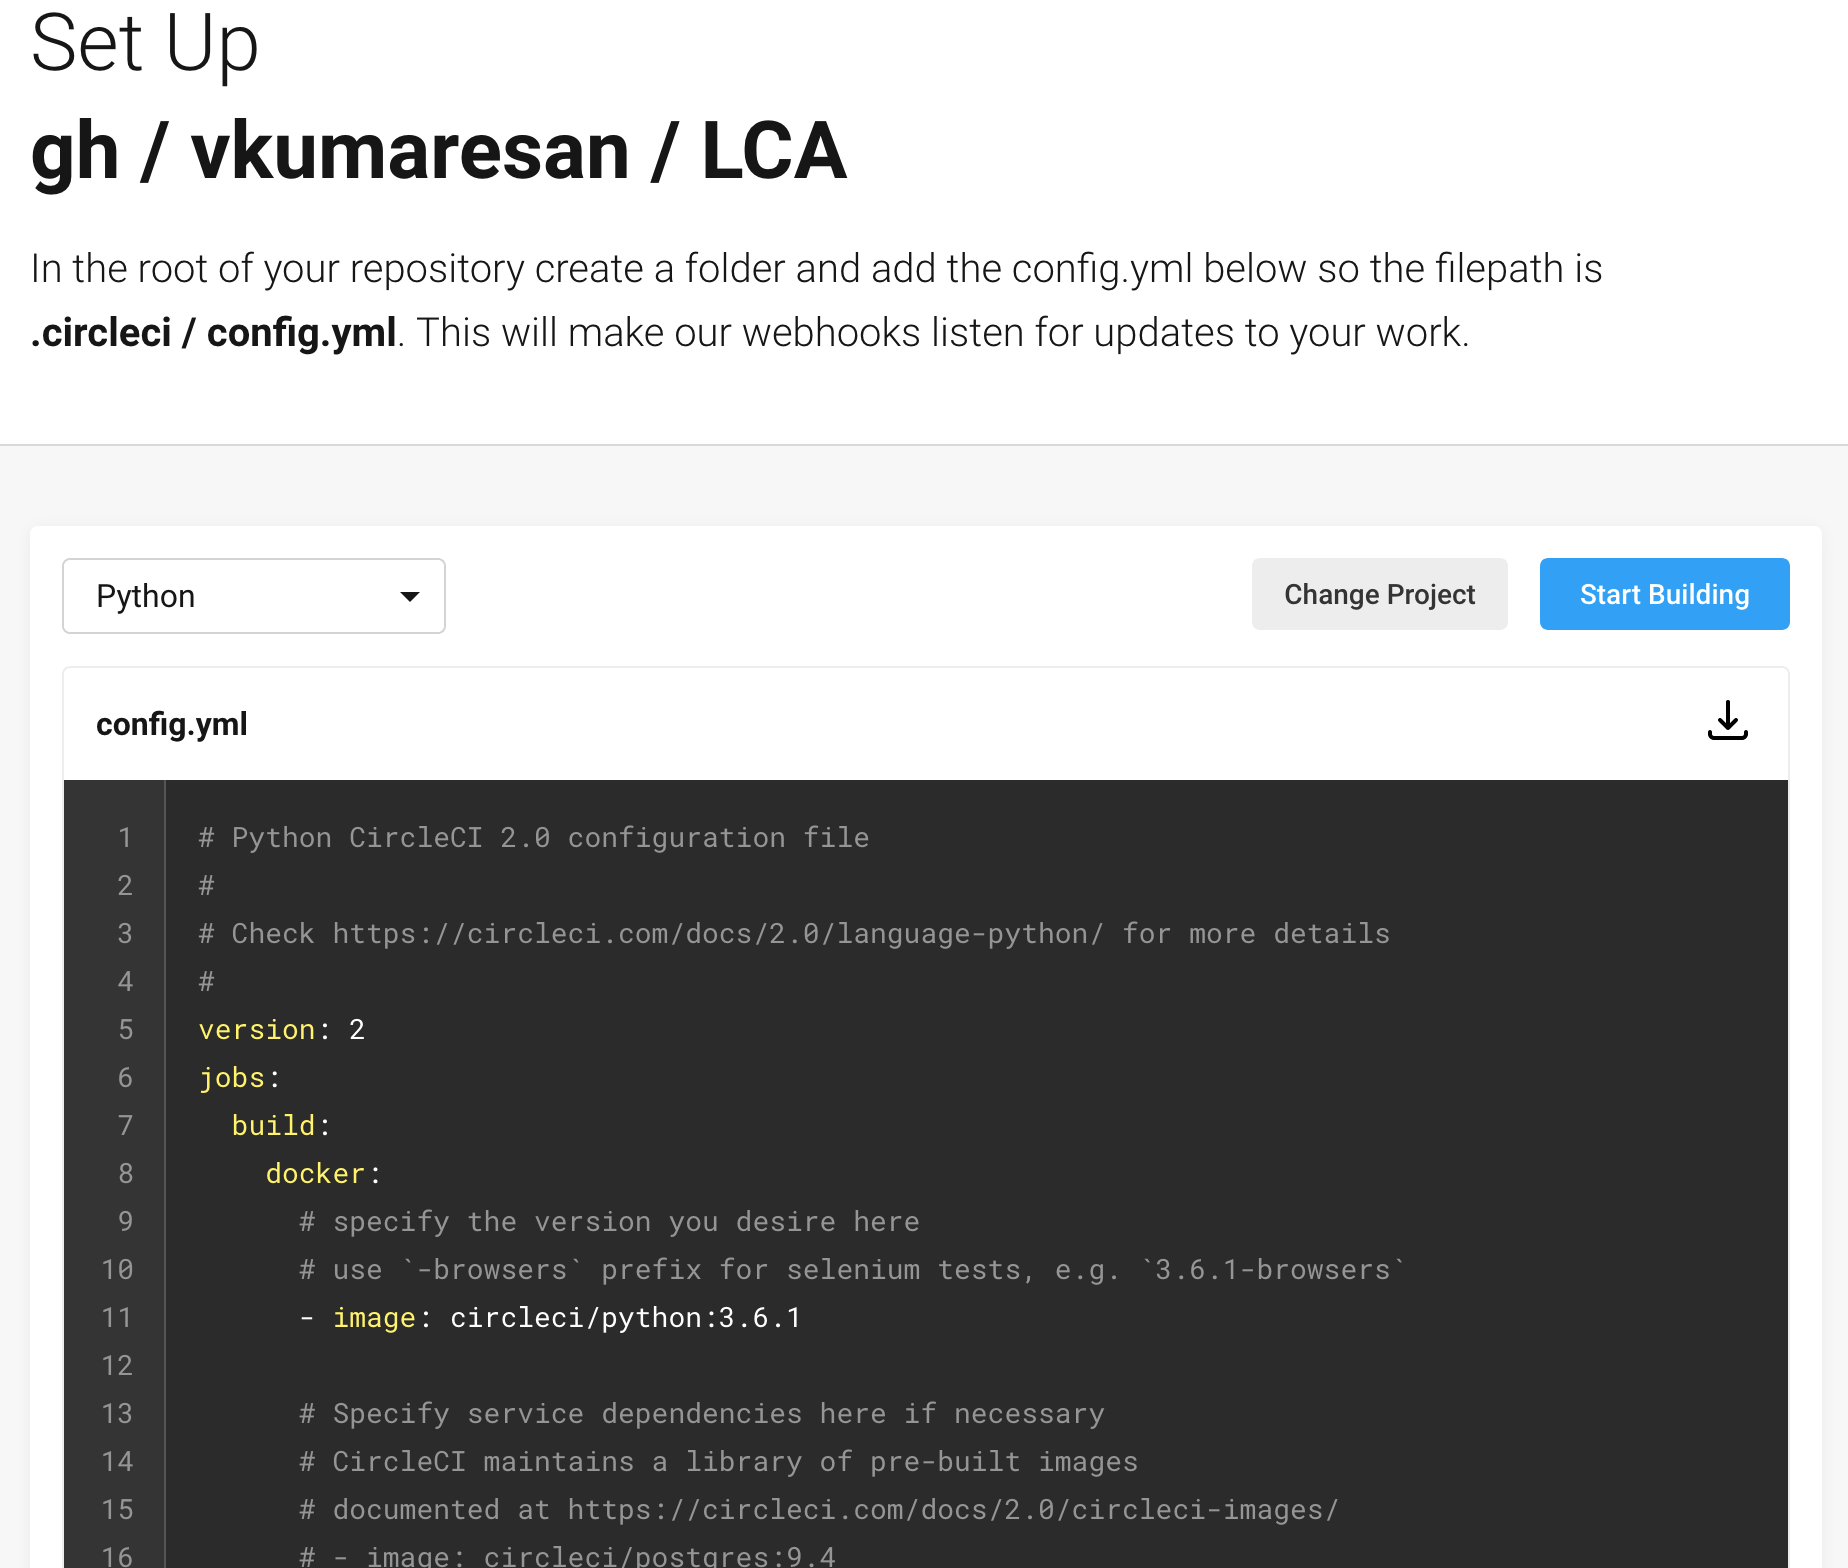 Setting up a Python config.yml file and downloading it for use in a project repository.
One you have this file downloaded, go back to your Github repository and follow these steps:
Create a ‘.circleci’ folder and upload your downloaded config.yml file here
This can be done within the Github interface.
Create a .gitignore file
This file is used to tell the program what non-essential files to ignore. You can look at a reference file here.
Create a Readme for the repository.
This is good behavior for any repository, but you can also add a badge to your repository by following the steps outlined here.
Create a MakeFile
This is the most important file for the continuous integration pipeline, since it allows the system to continuously install, test, and lint as you go along. We followed a template from our professor for this part, which you can also use for your data science project.
setup:
	python3 -m venv ~/.myrepo

install:
	pip install -r requirements.txt

test:
	python -m pytest -vv --cov=myrepolib tests/*.py
	python -m pytest --nbval notebook.ipynb


lint:
	pylint --disable=R,C myrepolib cli web

all: install lint test
This is a basic template that can obviously be changed, but it’s a good start to cover your basics.
Once these files are all in your repository, you should be able to go back to CircleCi and hit the ‘Start Building’ button. If all of the following steps work, then the build should pass; if not, then you might be missing a file or having an incorrect file in your repository.
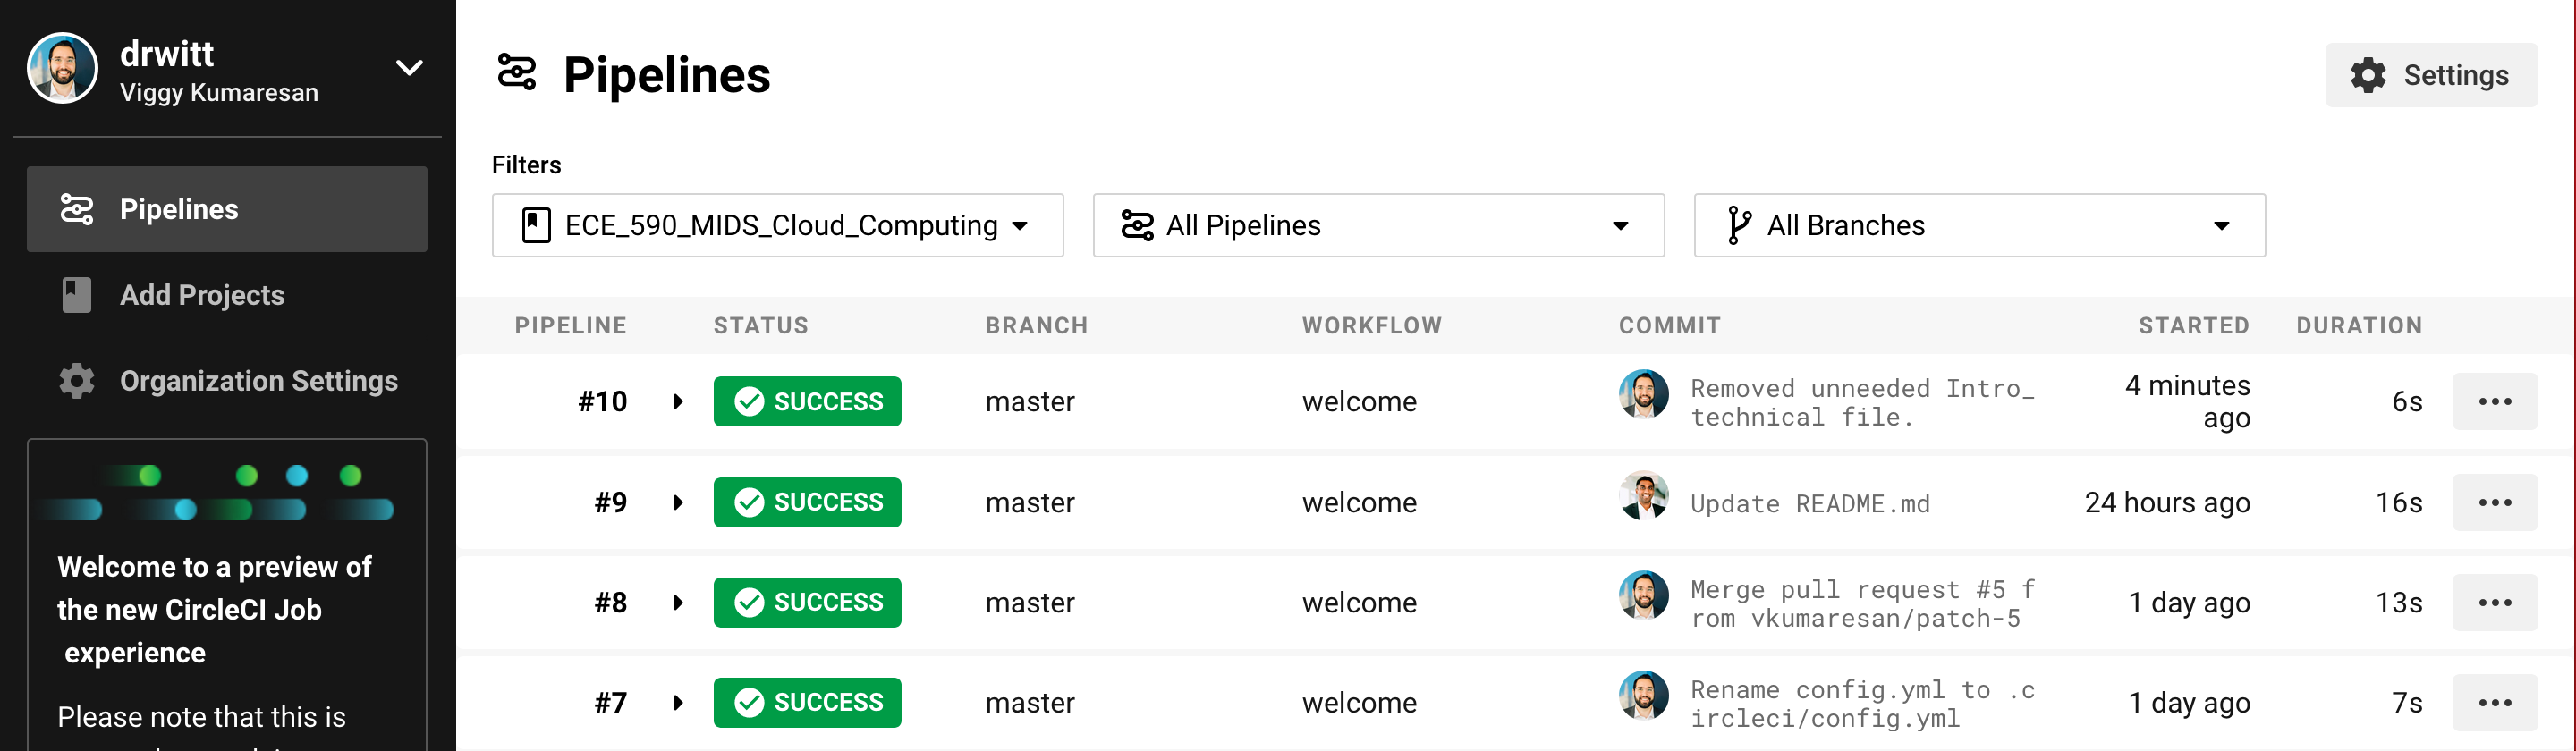 A snapshot of our CircleCi pipeline
Now you’re up and running! What a great feeling to have continuous integration. But this isn’t enough; you should configure your setup to be connected to a cloud service, like AWS or GCP. But how do we do that?
AWS Cloud9
This is where we’ll used Amazon’s cloud-based IDE! You can access this from the AWS console after you have logged in with your account (I use a Free Tier account). Once you’re in the console, search for Cloud9, start it up, and provision a virtual environment. This should bring you to this page:
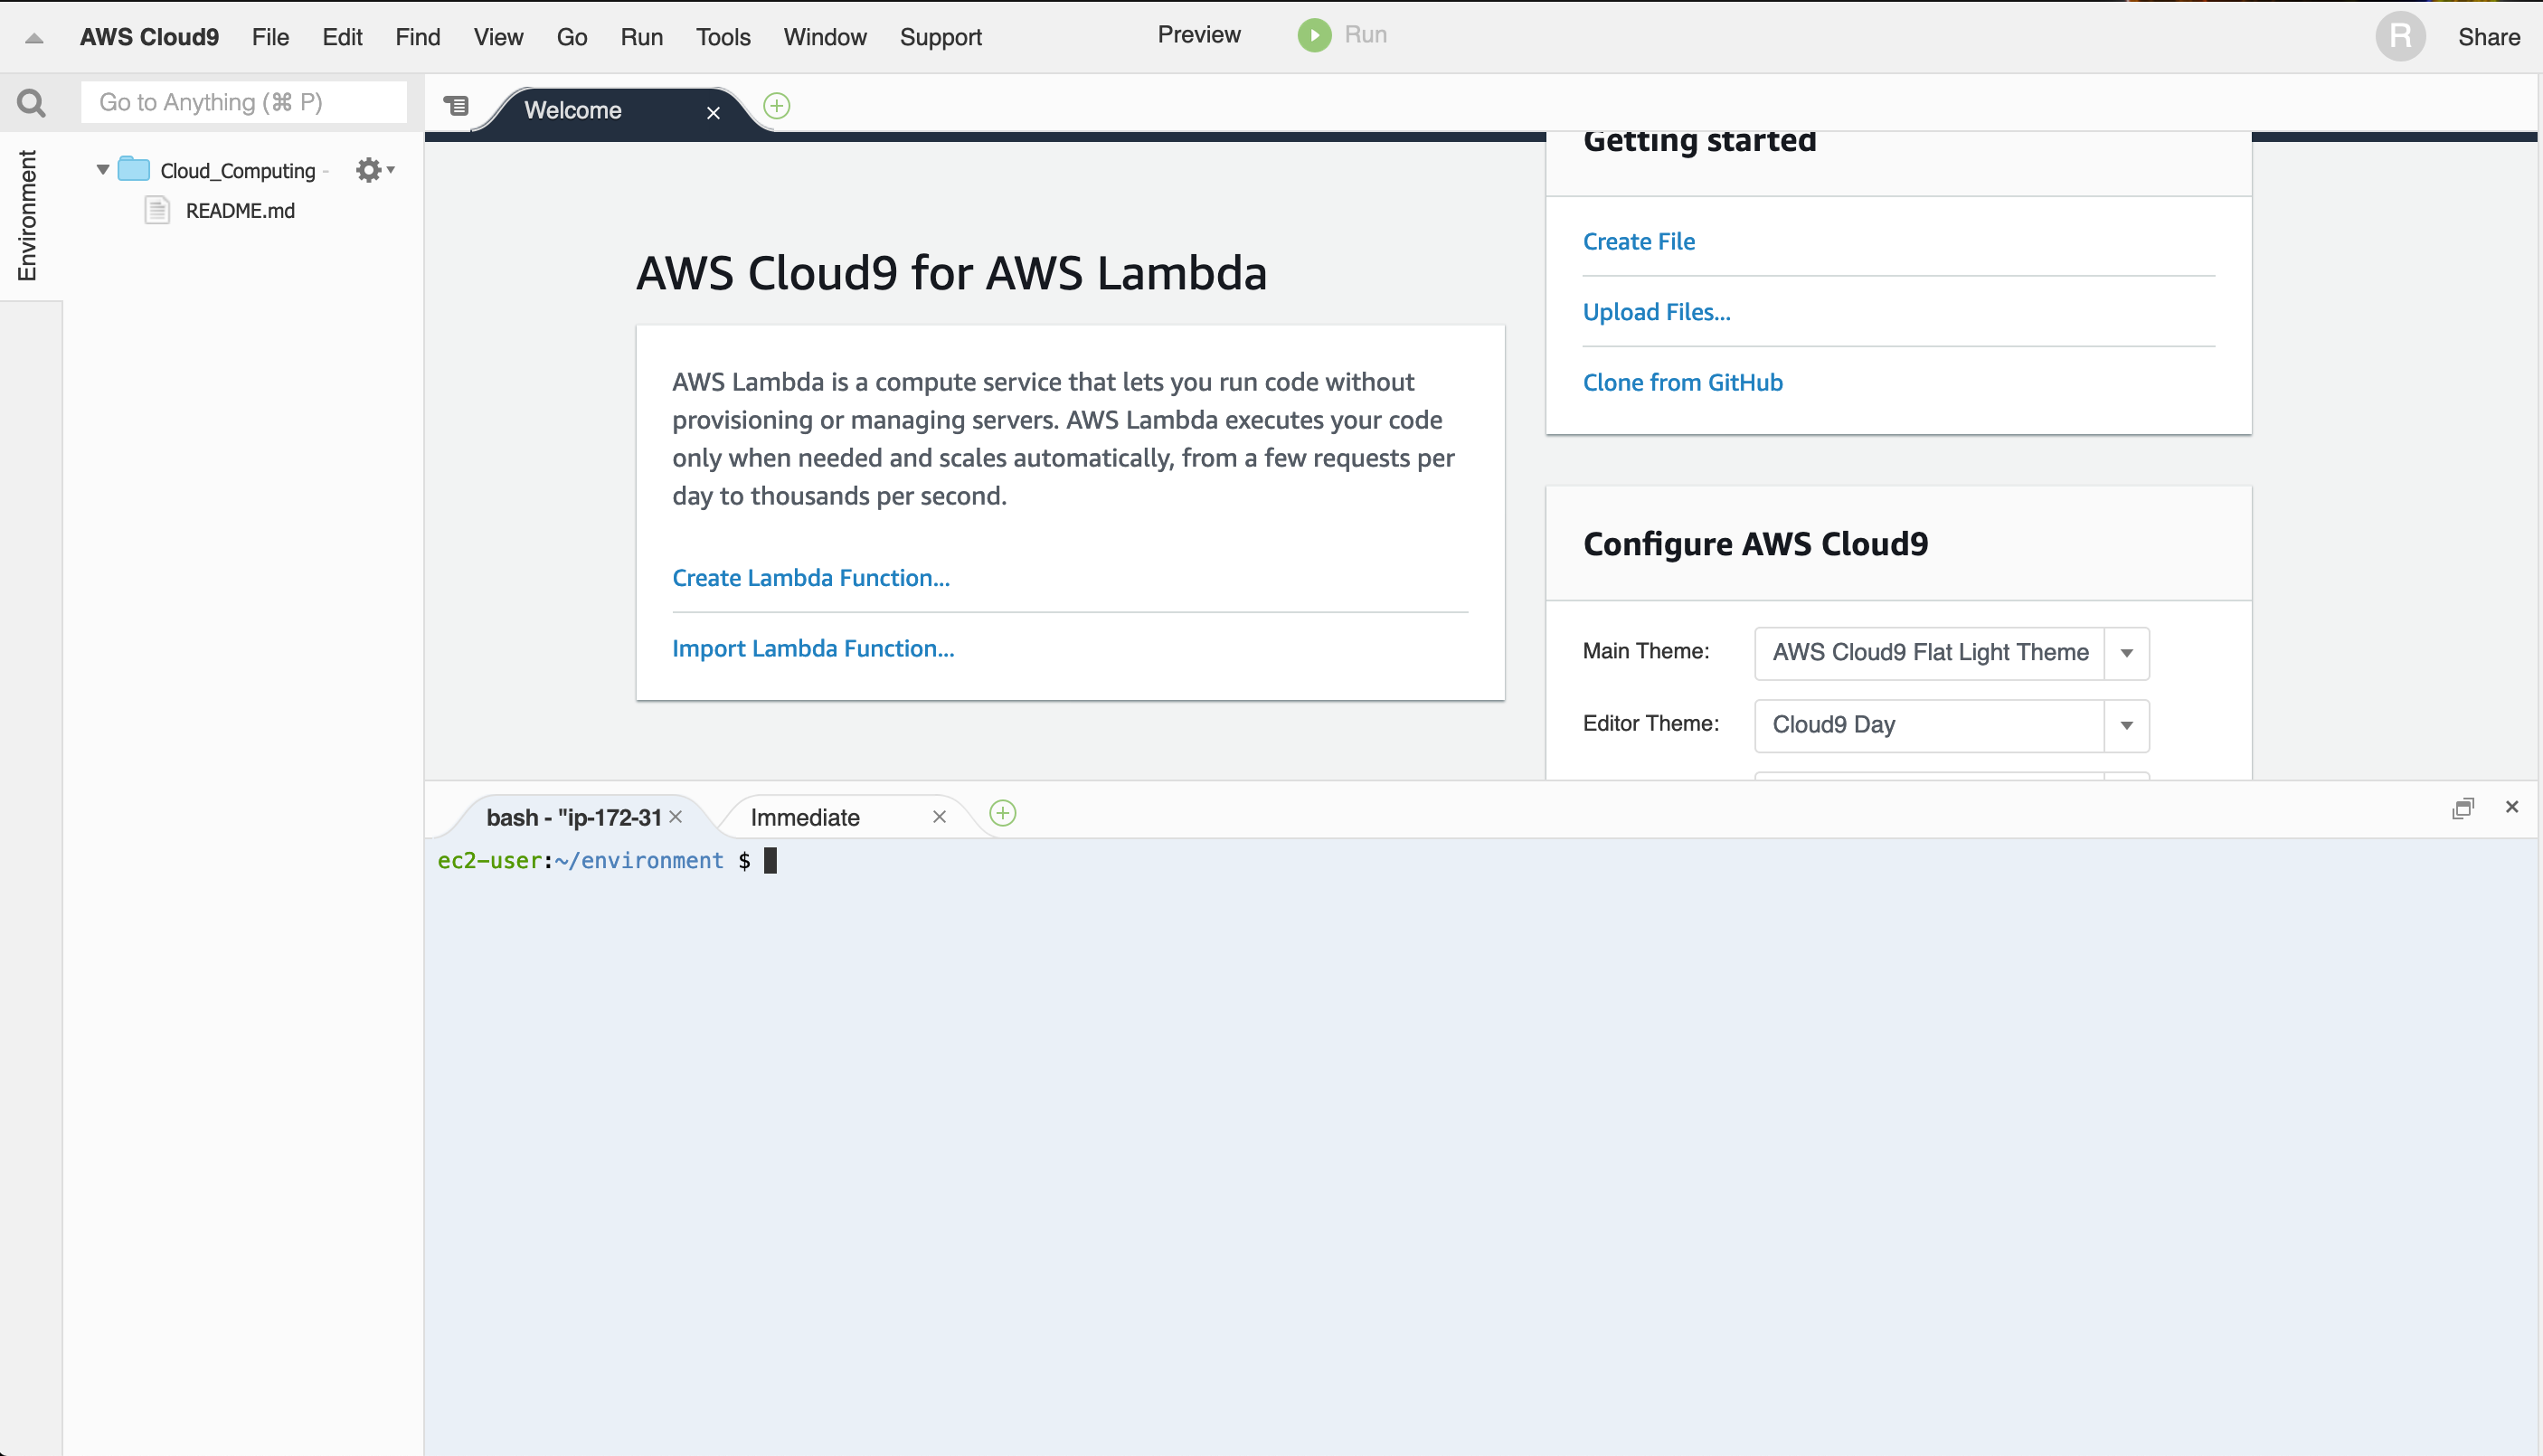 AWS Cloud9
Then you can clone your project repository, make changes, and push back to the repository. This will then trigger the continuous integration pipeline that you’ve set up, so you can go back to CircleCI and view your changes there.
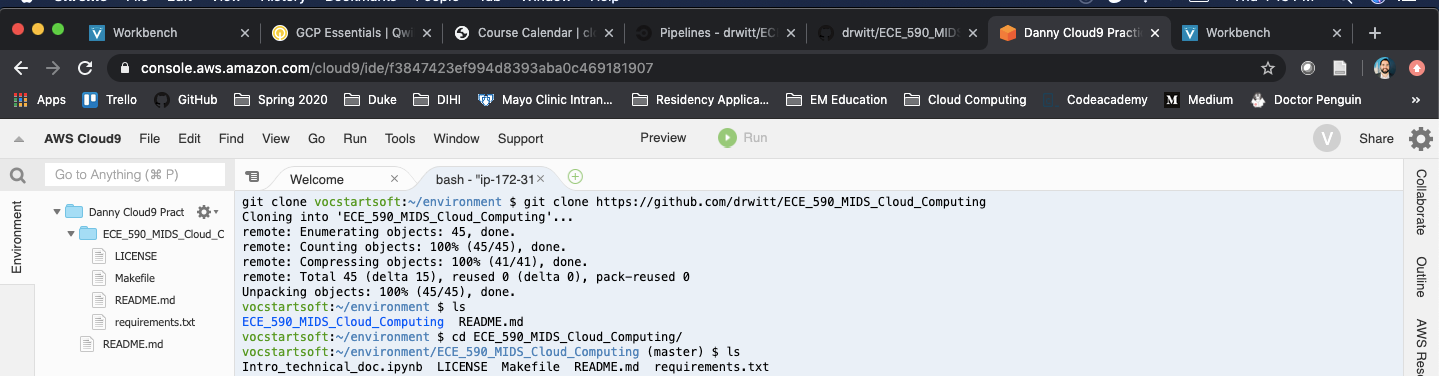

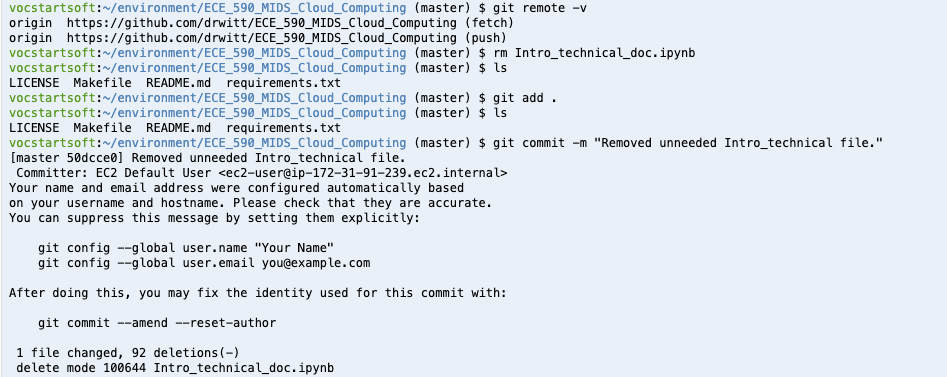 An example of cloning a repo, making a change, and then pushing this change to the repository through Cloud9
If you have a private repo, then you need to set up an SSH key on your Github account, and use this SSH key in your Cloud9 environment to get access to your repository. Information about adding an SSH key to your Github account can be found here.
That’s it for now! This is all relatively new to me, so it’s been interesting to dig deeper into this and start to learn about how to set up a foundation for data science at scale.